Showing posts with label Home Sweet Home. Show all posts

Saturday, July 19, 2014

Welcome to My Home

I love decorating and making things "homey," but sometimes that costs A LOT more money than we can afford as "starving college students." I have seen these monogram wreaths all over lately, and really wanted one to make our apartment more welcoming--but it was far outside of our budget. However, as with anything in life, being told no has never stopped me. ;) 

My parents happen to have just pruned their grape vines one week when I stopped by for a visit, so I grabbed an armful and went to work shaping them into a nice round wreath. Next, I used my Cricut to cut out various shapes, sizes, and colors of flowers:


I also used my Cricut to cut out a giant monogram "M" (also to celebrate that I finally "officially" changed my last name--two years later...). I traced my "M" on a piece of cardboard for a more dimensional effect, and cut it out with an exacto knife. I put it all together, and I must say that for something that was so ridiculously inexpensive (aka FREE!), I am extremely pleased with the result:


MUCH more homey and welcoming than just a generic dark apartment door. :)

Wednesday, July 16, 2014

What I Found While Watering the Flowers

While we live in a beautiful area up on the mountain and thus enjoy all the natural wonders around us--we also live on the third floor of an apartment complex, and so there isn't always a lot of natural flora and fauna to experience while in the apartment. My husband has been very helpful in building planter boxes for our porch, so I am able to entertain my own albeit little flower garden--that is as much of a garden as one can create on a third floor balcony. ;) I am quite proud of my little balcony garden actually, and quite enjoy spending time out with my little baby flowers.

Every morning I take a few minutes to check on my flowers--watering as needed, pruning, etc.--just as part of my daily routine. It is during this time I can hear the little hungry baby birdies crying for their breakfast (there is a hidden little black bird nest somewhere above our patio, deep in a crevice of the building, so you can't see it). I believe this is the second or third batch of birds this summer, and this past week they have sounded as if they are almost nearly old enough to leave the nest. 

However, a few days ago I took down a hanging flower basket outside from our patio in order to water it, and found something I definitely was NOT expecting...


This little guy just chillin' among my petunias--Well Good Morning indeed! I'm surprised, not just because it's not something I tend to find every day (I haven't really had many run-ins with snakes), but also because we are three stories off the ground in an apartment complex. Poor little guy must have been rather startled as well, because as soon as I saw him I dropped the basket and he crashed to the patio. 


Once my heart started beating again I suddenly began to realize that I couldn't hear the birds chirping as I generally do during my morning routine, and as my new little snake friend began to slink away I saw that he appeared to have recently eaten... which made me feel much less bad when I trapped him in a bucket to examine and determine his species (Gopher Snake by the way--for being named after a burrowing animal, it sure is good at scaling tall buildings) and show my husband.


Hopefully no more reptiles will be frequenting my flowers.

Tuesday, June 10, 2014

A Matching Serger Cover to Complete the Set

It took a while to get to (seems like I always have repairs or other projects that need me before I can get to the fun stuff!), I have finally completed my Serger Cover to match my original Sewing Machine Cover! Again, I didn't really have a pattern (although, in retrospect I believe I shall make one, as a serger is most definitely shaped quite differently from a sewing machine!), so I just went with the shape of my serger as best I could, and and voila! The finished product:


Complete with side pocket for scissors, tweezers, and accessories:


Once again I used a paper piecing pattern from sewhooked.com--I love the paper piecing, because I can utilize all those little scraps that I don't have much use for. I'm the sentimental type, so of course I still had a few scraps leftover from my sewing machine cover, and couldn't wait to use them to create a matching set! :)


Sunday, June 8, 2014

Pretty Pillows

Over the past several months we have been slowly collecting things for our new little apartment to make it feel more like "Home Sweet Home." Since we are of course your typical newly-wed-struggling-college-students, many of our additions come courtesy of DI and/or homemade. After we found our lovely little couch at DI, my younger brother decided it needed some pillows and was kind enough to purchase some for me (also from DI, we're big fans if you couldn't tell). I dug through my fabric bins to find some home decor fabric and I got right to work on recovering my new pillows!

The first pillow was tricky, as I attempted to recreate "The Easiest Pillow Cover Ever" that I have seen floating around Pinterest, but sadly for me it wasn't so easy... Here's what it's supposed to look like:


However, in retrospect, I think my decorator fabric was much to thick for this particular design, no matter how hard I tried to tie that blasted knot. I gave up and just bunched the fabric together in an effort to strangle the pillow, and one of those miraculous "happy accidents" of creating happened--it actually looked really good like that! So I quickly grabbed a needle and thread and tacked the fabric all around to create a lovely little flower!


For the remaining two pillows I kept it simple, although I did end use extra fabric from the first pillow and made matching piping. The best part was that I made one of these pillows completely wrong-side out, but didn't notice until I was totally finished and admiring them on the couch! I was so bummed out, and probably would have just left it that way, but since it didn't match its twin I had to fix it (my perfectionist gene). In the end though, I am quite pleased with the result:


Home Sweet Home! :)


Oh, and of course I can't forget to mention, my brother actually got me FOUR pillows, but I just couldn't recover the last one--it is perfect just the way it is. ;)


Sunday, June 2, 2013

A Castle for the Princess

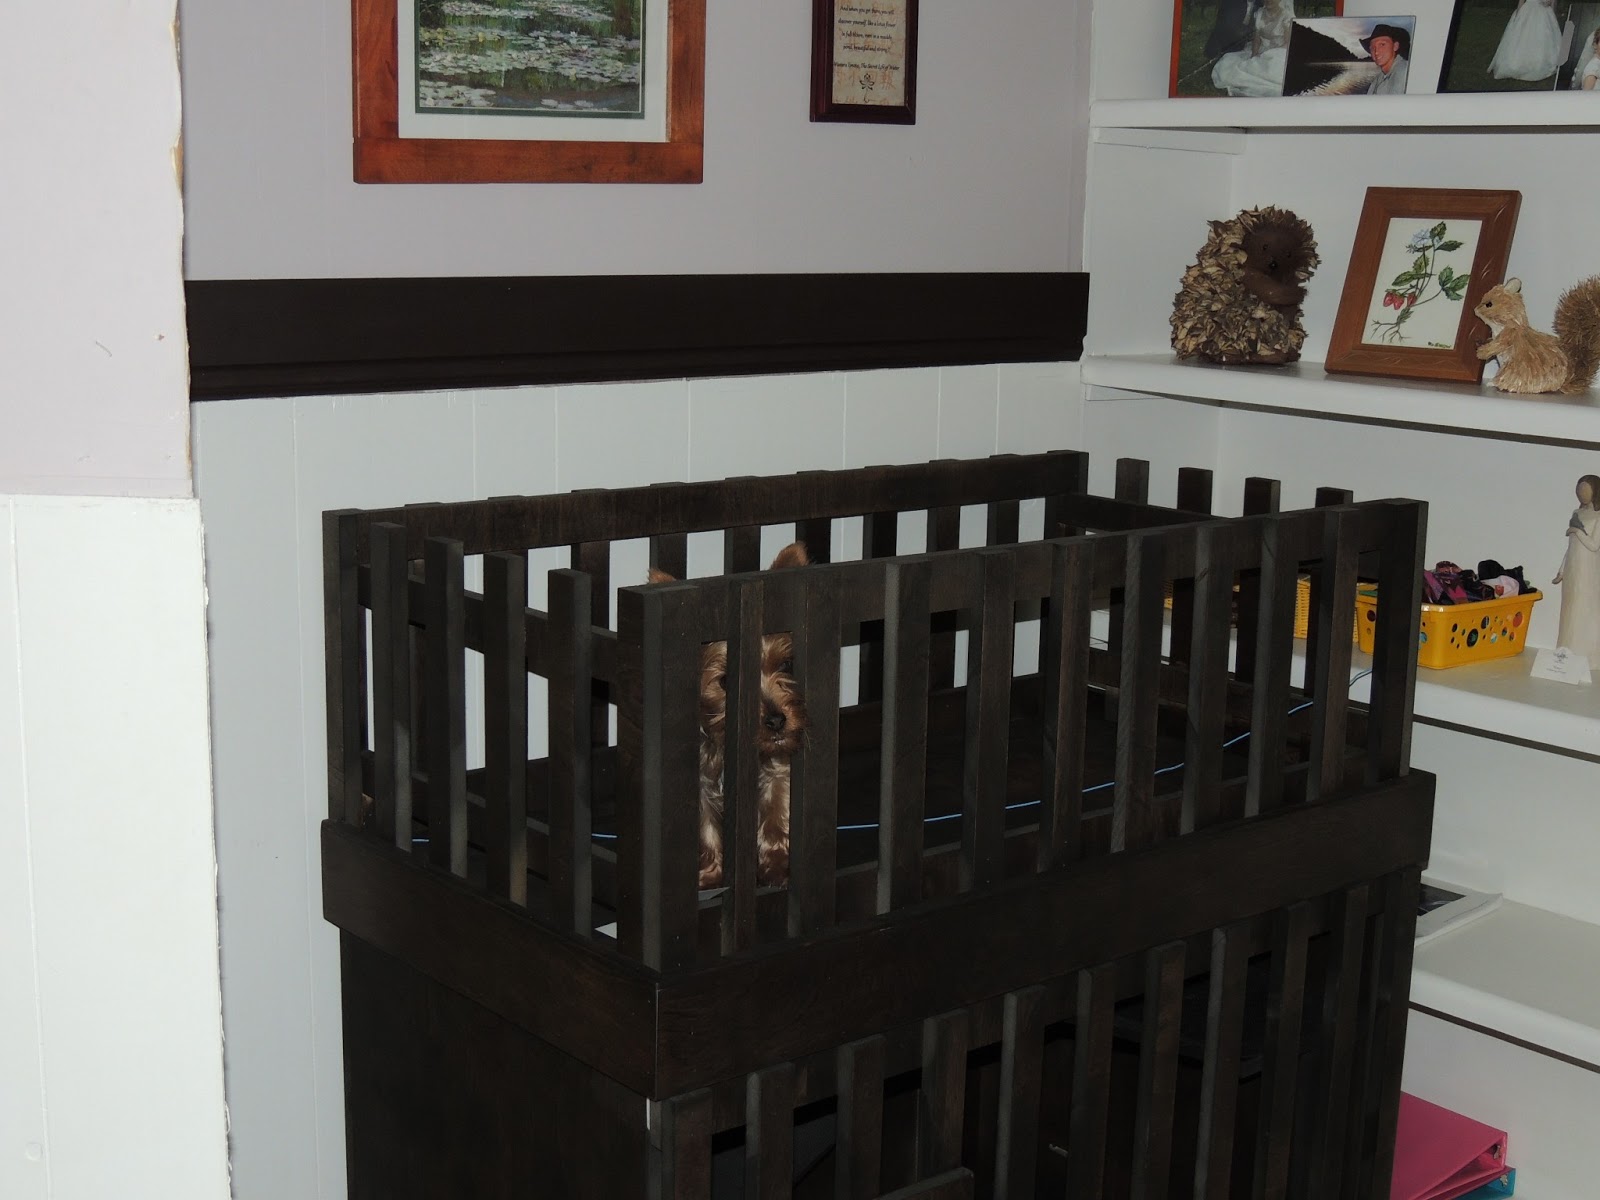
With the transition into marriage and moving and changing up our world, my little doggie has had some difficulties--particularly at nighttime--so, Kyler decided to make her a bed to help her sleep. I thought he was just going to make her a little kennel, but when I saw the finished product, I couldn't believe my eyes:


It's a CASTLE! Not just a castle--but a TWO-LEVEL castle, completely with a ramp to the top and a draw-bridge door for the entrance.

There she is up top! :)


Isn't she so cute? Still trying to figure out how to get back down, haha. ;)


It took her a few nights to get used to it, but now she LOVES it! She goes and takes naps in her castle throughout the day, it's so tender--she's our little princess! :)


Sunday, May 12, 2013

Mother's Day


I am so grateful for a mother who did just that! As I've been working on my own home and new family with my husband, I realize more and more every single day just how much my mother did for me--nothing less than amazing! If there's one thing that stands out the most, especially lately after moving again, I realize how grateful I am for the home that she created for us; our house was never just a house, it was a HOME--a refuge of safety and security where we could always come home to and know that no matter what, we were loved. As I create my own home now, I realize that not everyone has been blessed with such a place, and many do not know the beauty of having more than just a house, or apartment, or place of residence--the beauty and blessing of having a HOME. What my mother did for me has influenced my life far above anything else; I know that I am who I am today because of what my mother has done for me and continues to do for me--She defeinitely made our house into a home every single day, and it's made ALL the difference in my life--I love you Mama!! <3 nbsp="" p="">

Tuesday, January 22, 2013

Desk Makeover with the Cricut

Growing up we had this amazing monster of a desk--it was the most annoying yet most amazing thing ever! It's one of those old wooden desks. Annoying, because it was SO HUGE--it took up half of the wall, was super heavy, and somehow attracted shins, elbows, knees, you name it, to be bruised by its solid structure. On the other hand, it was amazing because it was so big--just the top alone provided so much space for work to be done! I have a love/hate relationship with this desk, so when it came time for deciding what to do with it in our new house, I was torn--it didn't fit or match, it just seemed to glare at me in our room! 

But one weekend I decided I wasn't quite ready to part with it--but it needed a serious makeover if it was going to fit a little more subtly into our lovely new home. So, I took a trip to Home Depot for some paint, pulled out my Cricut and vinyl, and went to work.

Before: 


 And after! I painted it a light gray/silver to tone it down a little more (we're going with the oriental look and calming fung shei in our bedroom), white just a hint of glimmery sheen to it (I might be married to a boy, but I still like to slip in my sparkle when I can), and then decked it out with flowers, birds, butterflies, and dragonflies I cut with my Cricut! (first time ever using vinyl--I was proud of myself) 

I was going for harmony--yin and yang--so I need silver AND gold, white AND black--however, I only had silver, black, and white, so I made do by painting the white with gold acrylic paints.

Humming birds for happiness:

Lotus-type blossoms for virtue and balance, dragonflies for passion and energy, and more humming birds for playfulness and joy! :)

I also took the remaining brocade fabric from my lampshade and pillow (mostly just scraps) and pieced together a matching runner to go across the desk, and a mat for my laptop.

The finished product--voila! :)


Monday, January 21, 2013

Canvas Art

I very much LOVE the look of canvas art--you've seen 'em, when people take their family pictures and whatnot and have them printed out on canvas? It just gives it a whole different feel, I love it--a more classy, artsy vibe to the room. So, as I've been making over my new home, I wanted said feeling--but do you know how much those canvas prints cost?! Much more than a newlywed can afford. I was bummed out, until one day while perusing Pinterest I discovered that you can make your own at home! Well of course I was right on board with that, so I picked out some pictures to match my room (photos I took of the gorgeous water lillies at Virginia Woolf's house (while everyone else was touring the house, I was out taking pictures of the pond of course)), and off to Costco to print!

It was SUPER easy--I just printed the sizes I wanted from Costco and glued them onto some canvas I had sitting around from a crazy sale at JoAnns. I painted the sides of the canvas black to match, then modge-podged over the top, and voila!


Tuesday, October 30, 2012

Upcycles in my Room

So, continuing on our home makeover (why buy new when you can make it prettier for cheaper?), I decided to recover my lovely pink pillow--what can I say, I'm a girly girl. :) --this particular pillow cover was one of my very first "home decor" projects. 

But it is definitely time for a change--to continue the theme of our new room, I headed off to JoAnns and purchased some gold and green brocades (I LOVE brocades!)--and here is the result:


Of course, since that upcycle was so much fun, I decided to try my hand at another one--this time, my little pink bed lamp (again, pink of course, haha). I forgot to get a full picture before I got started on my project, but I did snap one of the lamp shade, so you can see the big difference:

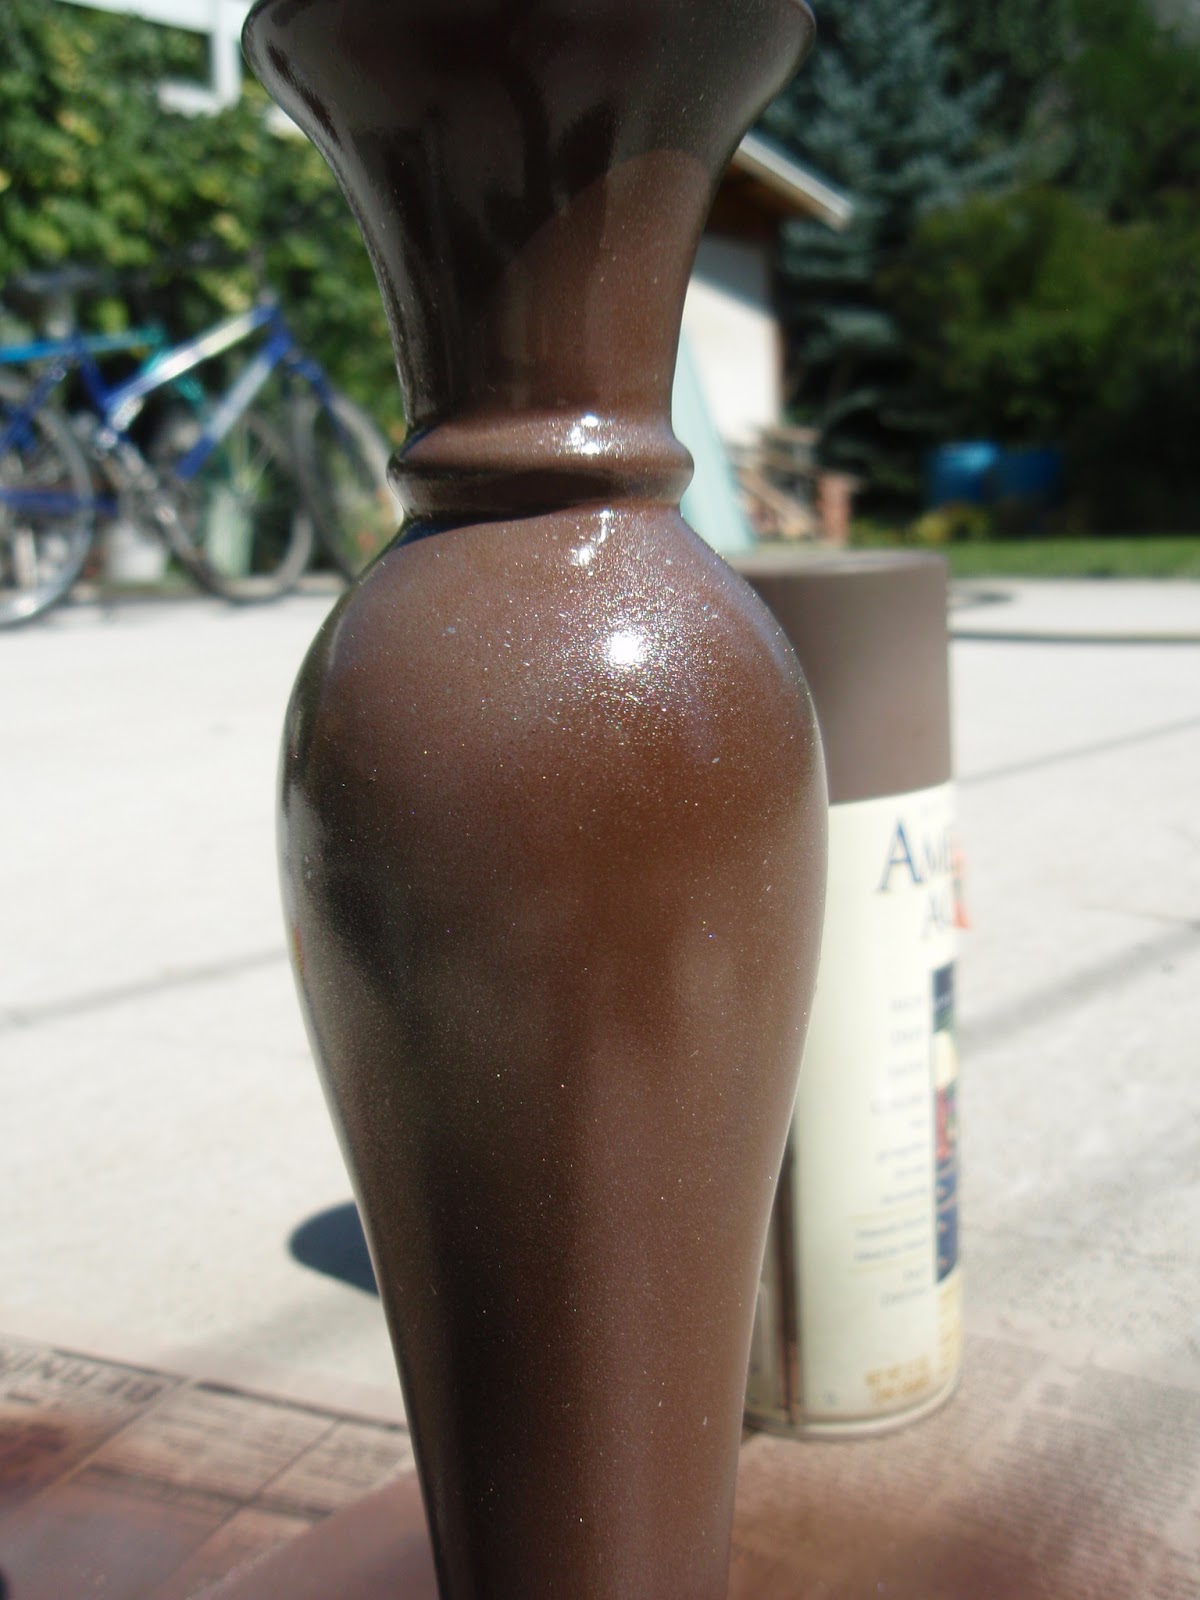
So out to the shed I went for some spray paint:

and painted the base (once pink) brown (but with some glittery top coat, haha):

There's the glittery shine! ;)

While that was drying, I got to work on the lampshade--real high tech pattern making, I know, I just rolled the lampshade and traced, like the kids do with shapes in first grade. :)

Once cut out, I simply glued the fabric onto the old shade with a glue gun.


Then I added just a bit of gold ribbon for the trim, and voila! :)

Thursday, August 16, 2012

Toilet Paper Art

Okay, so you all know those Toilet Paper Roll Art Projects popping up all over Pinterest? Yep, I've pinned just about every single one--for nearly a year now--and never actually got around to making one. Don't get me wrong, I loved the idea, but every time I started collecting tubes I'd get a pile of them, then think I just didn't have the time, or that it was more of a "want" not a "need," but most of all--didn't feel I had the time or justification to do something "fun." You see, I have this problem--my husband points it out nearly every day--where I just can't justify doing something fun, or something I WANT to do, or something just for me, until EVERYTHING else in the world is taken care of. Work first, play later--right? Yeah, not so right--I'm discovering that this mentality is more like the formula for a mental breakdown! Haha... 

But, one day I discovered that my sister had made one--and it was beautiful! So I started collecting toilet paper rolls again, because after I saw her creation I knew I really had to have one. :) Eventually I had quite a nice collection of rolls, but I was still having a hard time getting to it--until one day our bathroom flooded and the stress took me over. I was breaking down, and my husband MADE me (yes, MADE me) do something for myself--"ANYTHING babe, just do something that you don't HAVE to do--you'll feel better, I promise." He promised... yeah, Challenge Accepted my friend.

I dug out my stash of toilet paper rolls and salvaged the ones that had been spared from the flood, turned Psych on the TV, and went to work.


I started with flower petals, intended on making flowers, but when I saw all my petals sitting in a pile on the table, I suddenly began creating something completely different than I had planned.


I then found some wire and kept on creating...


Until eventually the project took over my entire worktable! (The worktable which, by the way, my wonderful husband built for my craft corner--boy I love my man)


It needed a little something more--so I spliced another toilet paper roll in half, and with some scissors and wire, made a toilet paper bird!


When I finished, I very carefully (this thing is quite large) carried it to the shop and had fun with some color.


Sparkly, silver butterflies...


and a beautiful blue songbird! :)


and the final project!!


Art is man's nature:
Nature is God's art.
~Philip James Bailey

This project was featured!

Crafty Confessions